Slow
Dough for Burek
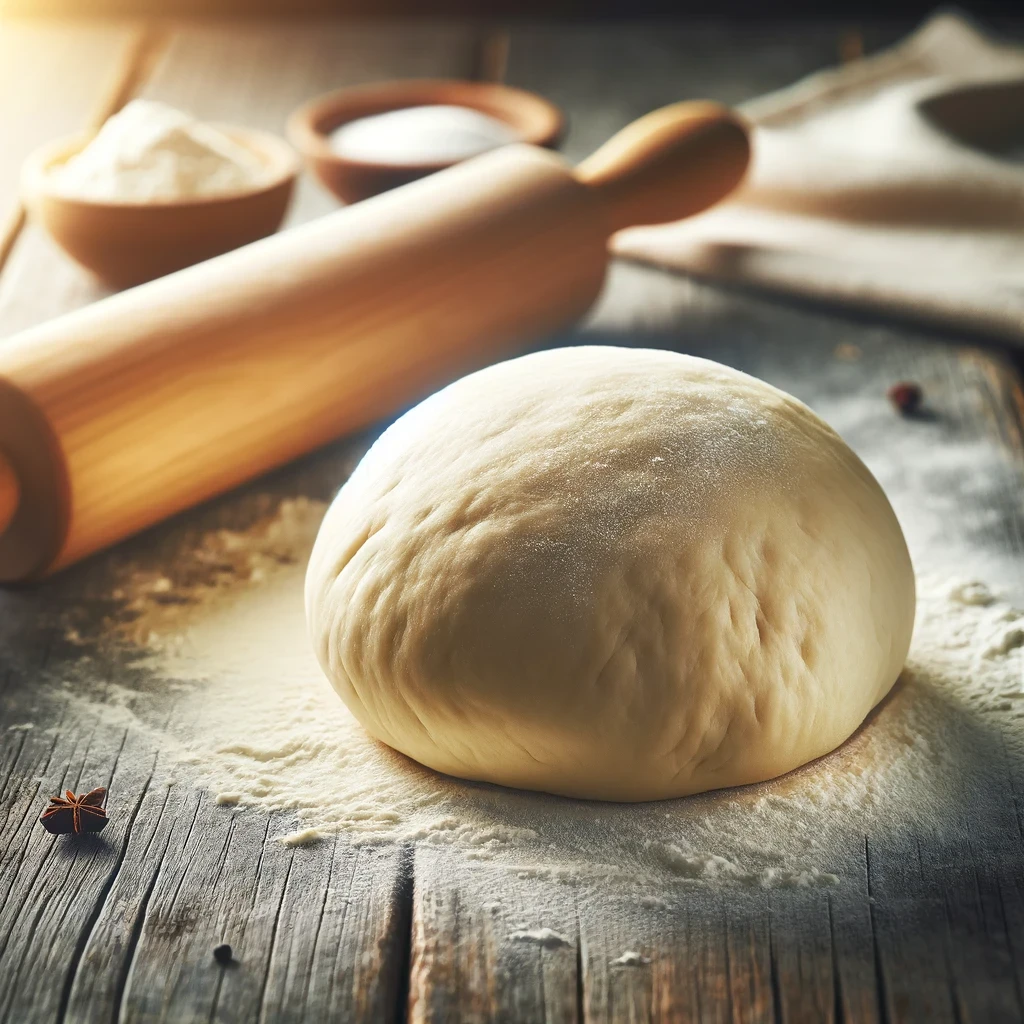
Making homemade dough for burek is a rewarding process! There's something unforgettable about the taste, a beloved pastry in the Balkans. If you're keen to bring a slice of Balkanian culinary tradition into your kitchen, here's a straightforward recipe for homemade Burek. While it's tempting to use pre-made phyllo for convenience, nothing compares to the texture and flavor of homemade dough. The process might take a bit of practice, particularly the stretching and rolling of the dough, but the results are well worth the effort. And if you're pressed for time, there's no shame in using store-bought phyllo—your secret is safe with us! Don't worry if you're a beginner, the process might seem a little challenging at first, but trust me, it's simpler than you think once you get the hang of it. All you need to start are some pantry staples: flour, water, oil, and a pinch of salt. The real secret to a superb Burek dough lies in its elasticity. This is where your patience and a good kneading technique come into play. Give your dough the time and attention it deserves, knead it until it's perfectly elastic. This step is crucial, so don't rush it. After your dough has been well worked, it needs a little break. Let it rest for a while before you start rolling it out. And remember, the thinner the better! In the end, you should be rewarded with a dough that's light, flaky, and ready to embrace whatever savory filling you have prepared for your Burek. Traditionally, Burek dough is stretched on a large table that's often covered with a tablecloth or some kind of cloth. This method helps in handling the dough without sticking and allows it to be stretched very thinly without tearing. The tablecloth also aids in the maneuvering of the dough, making it easier to lift and expand to the desired thinness, which is crucial for creating the perfect Burek. This technique showcases the skill and tradition that goes into making authentic burek. Here’s a video demonstrating this method. However, this recipe simplifies the stretching process to make it easier. Enjoy the process, and most importantly, enjoy your homemade Burek!
⛰️
Difficult
⏱️
2 hours - 3 hours
🥘
Kneading
👽
Many
Slow
Dough for Burek
Making homemade dough for burek is a rewarding process! There's something unforgettable about the taste, a beloved pastry in the Balkans. If you're keen to bring a slice of Balkanian culinary tradition into your kitchen, here's a straightforward recipe for homemade Burek. While it's tempting to use pre-made phyllo for convenience, nothing compares to the texture and flavor of homemade dough. The process might take a bit of practice, particularly the stretching and rolling of the dough, but the results are well worth the effort. And if you're pressed for time, there's no shame in using store-bought phyllo—your secret is safe with us! Don't worry if you're a beginner, the process might seem a little challenging at first, but trust me, it's simpler than you think once you get the hang of it. All you need to start are some pantry staples: flour, water, oil, and a pinch of salt. The real secret to a superb Burek dough lies in its elasticity. This is where your patience and a good kneading technique come into play. Give your dough the time and attention it deserves, knead it until it's perfectly elastic. This step is crucial, so don't rush it. After your dough has been well worked, it needs a little break. Let it rest for a while before you start rolling it out. And remember, the thinner the better! In the end, you should be rewarded with a dough that's light, flaky, and ready to embrace whatever savory filling you have prepared for your Burek. Traditionally, Burek dough is stretched on a large table that's often covered with a tablecloth or some kind of cloth. This method helps in handling the dough without sticking and allows it to be stretched very thinly without tearing. The tablecloth also aids in the maneuvering of the dough, making it easier to lift and expand to the desired thinness, which is crucial for creating the perfect Burek. This technique showcases the skill and tradition that goes into making authentic burek. Here’s a video demonstrating this method. However, this recipe simplifies the stretching process to make it easier. Enjoy the process, and most importantly, enjoy your homemade Burek!
⛰️
Difficult
⏱️
2 hours - 3 hours
🥘
Kneading
👽
Many
🧺
INGREDIENTS
🔪
KITCHEN EQUIPMENT
OPTIONAL
👩🏻🍳
Preparation
Prepare the Dough:
In a large mixing bowl, combine 3 ½ cups (500 g) of flour with 1 teaspoon of salt. Stir the ingredients together until evenly distributed.
Gradually add 300-350 ml (1 ¼ - 1 ½ cups) of lukewarm water to the flour mixture, a little at a time. Mix continuously until the mixture starts to come together and forms a dough.
Once the dough begins to form, use your hands to knead it in the bowl. Continue kneading for about 5 minutes, or until the dough becomes smooth and stretchy.
Divide and Flatten the Dough:
Divide the dough into four equal portions.
On a lightly floured surface, press down each portion with your hands to flatten them into discs.
Prepare for Layering:
Find a bowl or pan that is large enough to accommodate the stacked dough pieces.
Lightly grease the pan or bowl with a small amount of vegetable oil.
Place the first flattened dough disc into the greased pan. Brush or drizzle a bit more oil on top of the dough.
Place the second flattened dough disc on top of the oiled first disc. Repeat this process, adding a small amount of oil between each layer, until all four pieces of dough are stacked.
Finish by adding a bit more oil on top of the final dough layer. Set the pan aside to rest.
Preheat the Oven: Preheat your oven to 390°F (200°C).
Roll Out the Dough:
Lightly oil your work surface with vegetable oil.
Remove one stacked dough disc from the pan and place it on the oiled surface.
Flatten the dough using a rolling pin, aiming for a thickness of no more than about ½ centimeter (5 mm).
Carefully stretch and pull the dough outwards, working to increase its diameter to about 1 meter. It's okay if the dough develops a few holes; just stretch it as evenly as possible. Here is a video.
Add the Filling:
Place the stretched dough sheet on the work surface.
Spoon your chosen filling (see filling options below) along one edge of the dough, leaving about three fingers’ width from the edge.
If the edges of the dough are thick, trim them and discard the excess.
Roll and Shape:
Carefully roll the dough from the filled edge to create a log or cylinder.
Coil the rolled dough into a spiral or snail-like shape, and place it into a baking pan or oven-safe dish.
Bake:
Place the pan in the preheated oven.
Bake for about 30 minutes, or until the burek turns golden brown and crisp.
Cool and Serve:
Remove the pan from the oven and let the burek cool slightly.
Cut the burek into 12 pieces.
Serve warm and enjoy!
TYPE OF BUREK
Cheese Burek: Filled with a mix of white cheeses, which can include cow, sheep, or goat cheese, along with feta and cottage cheese. It's creamy and tangy, a favorite among those who prefer vegetarian options.
Meat Burek: Contains a savory filling of ground meat, typically combination of beef, pork, and/or lamb), mixed with spices and sometimes onions. It's hearty and flavorful, often regarded as the most popular type of Burek.
Leek Burek: This variant mixes leeks with white cheese, offering a delicious and somewhat healthier option. It’s perfect for vegetarians looking for a rich, savory pastry.
Pizza Burek: A modern twist on traditional Burek, this version incorporates pizza-like ingredients such as ham, mushrooms, various cheeses, and sometimes ketchup for added flavor.
⭐️
Bonus recipe
Making homemade dough for burek is a rewarding process! There's something unforgettable about the taste, a beloved pastry in the Balkans. If you're keen to bring a slice of Balkanian culinary tradition into your kitchen, here's a straightforward recipe for homemade Burek. While it's tempting to use pre-made phyllo for convenience, nothing compares to the texture and flavor of homemade dough. The process might take a bit of practice, particularly the stretching and rolling of the dough, but the results are well worth the effort. And if you're pressed for time, there's no shame in using store-bought phyllo—your secret is safe with us! Don't worry if you're a beginner, the process might seem a little challenging at first, but trust me, it's simpler than you think once you get the hang of it. All you need to start are some pantry staples: flour, water, oil, and a pinch of salt. The real secret to a superb Burek dough lies in its elasticity. This is where your patience and a good kneading technique come into play. Give your dough the time and attention it deserves, knead it until it's perfectly elastic. This step is crucial, so don't rush it. After your dough has been well worked, it needs a little break. Let it rest for a while before you start rolling it out. And remember, the thinner the better! In the end, you should be rewarded with a dough that's light, flaky, and ready to embrace whatever savory filling you have prepared for your Burek. Traditionally, Burek dough is stretched on a large table that's often covered with a tablecloth or some kind of cloth. This method helps in handling the dough without sticking and allows it to be stretched very thinly without tearing. The tablecloth also aids in the maneuvering of the dough, making it easier to lift and expand to the desired thinness, which is crucial for creating the perfect Burek. This technique showcases the skill and tradition that goes into making authentic burek. Here’s a video demonstrating this method. However, this recipe simplifies the stretching process to make it easier. Enjoy the process, and most importantly, enjoy your homemade Burek!
Making homemade dough for burek is a rewarding process! There's something unforgettable about the taste, a beloved pastry in the Balkans. If you're keen to bring a slice of Balkanian culinary tradition into your kitchen, here's a straightforward recipe for homemade Burek. While it's tempting to use pre-made phyllo for convenience, nothing compares to the texture and flavor of homemade dough. The process might take a bit of practice, particularly the stretching and rolling of the dough, but the results are well worth the effort. And if you're pressed for time, there's no shame in using store-bought phyllo—your secret is safe with us! Don't worry if you're a beginner, the process might seem a little challenging at first, but trust me, it's simpler than you think once you get the hang of it. All you need to start are some pantry staples: flour, water, oil, and a pinch of salt. The real secret to a superb Burek dough lies in its elasticity. This is where your patience and a good kneading technique come into play. Give your dough the time and attention it deserves, knead it until it's perfectly elastic. This step is crucial, so don't rush it. After your dough has been well worked, it needs a little break. Let it rest for a while before you start rolling it out. And remember, the thinner the better! In the end, you should be rewarded with a dough that's light, flaky, and ready to embrace whatever savory filling you have prepared for your Burek. Traditionally, Burek dough is stretched on a large table that's often covered with a tablecloth or some kind of cloth. This method helps in handling the dough without sticking and allows it to be stretched very thinly without tearing. The tablecloth also aids in the maneuvering of the dough, making it easier to lift and expand to the desired thinness, which is crucial for creating the perfect Burek. This technique showcases the skill and tradition that goes into making authentic burek. Here’s a video demonstrating this method. However, this recipe simplifies the stretching process to make it easier. Enjoy the process, and most importantly, enjoy your homemade Burek!
Making homemade dough for burek is a rewarding process! There's something unforgettable about the taste, a beloved pastry in the Balkans. If you're keen to bring a slice of Balkanian culinary tradition into your kitchen, here's a straightforward recipe for homemade Burek. While it's tempting to use pre-made phyllo for convenience, nothing compares to the texture and flavor of homemade dough. The process might take a bit of practice, particularly the stretching and rolling of the dough, but the results are well worth the effort. And if you're pressed for time, there's no shame in using store-bought phyllo—your secret is safe with us! Don't worry if you're a beginner, the process might seem a little challenging at first, but trust me, it's simpler than you think once you get the hang of it. All you need to start are some pantry staples: flour, water, oil, and a pinch of salt. The real secret to a superb Burek dough lies in its elasticity. This is where your patience and a good kneading technique come into play. Give your dough the time and attention it deserves, knead it until it's perfectly elastic. This step is crucial, so don't rush it. After your dough has been well worked, it needs a little break. Let it rest for a while before you start rolling it out. And remember, the thinner the better! In the end, you should be rewarded with a dough that's light, flaky, and ready to embrace whatever savory filling you have prepared for your Burek. Traditionally, Burek dough is stretched on a large table that's often covered with a tablecloth or some kind of cloth. This method helps in handling the dough without sticking and allows it to be stretched very thinly without tearing. The tablecloth also aids in the maneuvering of the dough, making it easier to lift and expand to the desired thinness, which is crucial for creating the perfect Burek. This technique showcases the skill and tradition that goes into making authentic burek. Here’s a video demonstrating this method. However, this recipe simplifies the stretching process to make it easier. Enjoy the process, and most importantly, enjoy your homemade Burek!
Go to recipe immediately! ↓